
From EKS to AKS: A Practical Migration Guide for Kubernetes Teams
Your company just announced a strategic partnership with Microsoft, and now you’re staring at a deadline to migrate three production EKS clusters to Azure. The good news? Your Kubernetes expertise transfers. The bad news? Everything around it—networking, IAM, storage classes—works just differently enough to trip you up.
I’ve led two EKS-to-AKS migrations over the past eighteen months, and the pattern is consistent: teams underestimate the differences in the managed Kubernetes layer while overestimating the differences in Kubernetes itself. Your pods, deployments, and services work identically. But the moment you need to grant a pod access to a secret store, configure ingress networking, or set up cluster autoscaling, you’re navigating a different ecosystem with different assumptions baked in.
The real challenge isn’t technical complexity—it’s mental model translation. EKS operates on AWS’s philosophy of giving you primitives and letting you assemble them. AKS follows Azure’s pattern of providing more integrated, opinionated defaults. Neither approach is wrong, but if you carry EKS assumptions into AKS architecture decisions, you’ll fight the platform instead of leveraging it.
This guide focuses on the translation layer: where concepts map directly, where they diverge, and where AKS offers capabilities that don’t have EKS equivalents at all. I’m assuming you know Kubernetes well and have production EKS experience. We’ll skip the basics and go straight to the decisions that determine whether your migration takes two weeks or two months.
Let’s start with the foundational differences in how these platforms think about cluster architecture.
The Mental Model Shift: EKS vs AKS Architecture
Before diving into commands and configurations, you need to recalibrate how you think about managed Kubernetes. EKS and AKS share the same Kubernetes core, but they wrap it in fundamentally different philosophies that affect every decision you’ll make.
Control Plane Philosophy
EKS operates on the principle of maximum flexibility. AWS gives you a managed control plane, then steps back and lets you wire everything together—VPCs, IAM policies, node groups, add-ons. This approach rewards deep AWS expertise but demands significant upfront investment in infrastructure-as-code.
AKS takes the opposite stance. Microsoft pre-integrates components and makes opinionated choices on your behalf. The control plane comes bundled with Azure Active Directory integration, Azure Monitor for containers, and managed identity support enabled by default. You trade some flexibility for faster time-to-production.
This distinction matters when planning migrations. Features you explicitly configured in EKS—like OIDC providers for IRSA or Container Insights—often exist as toggleable options in AKS rather than separate infrastructure components.
Networking Paradigms
EKS defaults to the AWS VPC CNI, which assigns real VPC IP addresses to every pod. This approach provides native VPC integration but consumes IP addresses rapidly, making CIDR planning critical in large deployments.
AKS offers two primary options: Azure CNI and kubenet. Azure CNI mirrors the EKS approach—pods receive addresses from your virtual network subnet. Kubenet uses NAT to conserve IP addresses, placing pods on a separate overlay network. AKS also supports Azure CNI Overlay, which combines the VPC integration benefits of CNI with the IP conservation of kubenet.
💡 Pro Tip: If your EKS clusters use secondary CIDR blocks or custom networking to manage IP exhaustion, Azure CNI Overlay solves the same problem with less configuration overhead.
Identity Integration
IAM Roles for Service Accounts (IRSA) in EKS lets pods assume IAM roles through OIDC federation. The AKS equivalent—Azure AD Workload Identity—follows the same pattern but integrates with Azure’s identity platform. Both use projected service account tokens, so the mental model transfers directly.
The key difference: AKS workload identity requires creating federated credentials that bind Kubernetes service accounts to Azure managed identities. It’s an extra mapping layer, but it provides cleaner separation between cluster configuration and Azure RBAC.
Node Pool Behavior
Node pools in both platforms group nodes with shared configurations. The scaling mechanics differ subtly. EKS node groups integrate with EC2 Auto Scaling Groups, inheriting all their behaviors—launch templates, mixed instance policies, capacity rebalancing. AKS node pools use Virtual Machine Scale Sets with their own scaling logic and update semantics.
Spot instance handling also varies. EKS Spot instances follow standard EC2 interruption patterns. AKS Spot node pools have configurable eviction policies and can set maximum prices directly in the node pool definition.
With this mental map established, let’s translate these concepts into concrete infrastructure by examining the cluster provisioning workflow.
Cluster Provisioning: From eksctl to az aks create
If you’ve spent years provisioning EKS clusters with eksctl, the transition to Azure’s CLI tooling feels surprisingly familiar. The core workflow remains the same: authenticate, configure, create. The differences lie in Azure’s resource hierarchy and the specific flags that unlock production-grade features.
Setting Up Your Azure Environment
Before creating clusters, establish your Azure CLI foundation. Unlike AWS where you configure a default region, Azure requires explicit subscription selection—particularly important in enterprise environments with multiple subscriptions.
## Install Azure CLI (macOS/Linux)curl -sL https://aka.ms/InstallAzureCLIDeb | sudo bash
## Authenticate and set subscriptionaz loginaz account list --output tableaz account set --subscription "Production-Kubernetes"
## Register required providers (one-time setup)az provider register --namespace Microsoft.ContainerServiceaz provider register --namespace Microsoft.OperationsManagement
Azure’s provider registration step catches many EKS veterans off guard. Unlike AWS where services are available immediately, Azure requires explicit namespace registration for certain features. This is a one-time operation per subscription, but forgetting it leads to cryptic errors during cluster creation. You can verify registration status with az provider show --namespace Microsoft.ContainerService --query "registrationState".
Creating a Production-Ready Cluster
Here’s where AKS shines: a single command can provision a cluster with monitoring, policy enforcement, and secrets integration baked in. Compare this to EKS where you’d layer on Prometheus, OPA Gatekeeper, and External Secrets Operator separately.
## Create resource group (Azure's equivalent to organizing resources)az group create --name rg-kubernetes-prod --location eastus2
## Create AKS cluster with production defaultsaz aks create \  --resource-group rg-kubernetes-prod \  --name aks-prod-cluster \  --node-count 3 \  --node-vm-size Standard_D4s_v5 \  --enable-managed-identity \  --enable-aad \  --enable-azure-rbac \  --enable-addons monitoring,azure-policy,azure-keyvault-secrets-provider \  --enable-cluster-autoscaler \  --min-count 3 \  --max-count 10 \  --network-plugin azure \  --network-policy azure \  --zones 1 2 3 \  --tier standard \  --generate-ssh-keys
## Get credentials for kubectlaz aks get-credentials --resource-group rg-kubernetes-prod --name aks-prod-cluster
The --enable-addons flag deserves attention. The monitoring addon deploys Container Insights with a pre-configured Log Analytics workspace, giving you immediate visibility into cluster health, container logs, and resource utilization without additional tooling. Azure Policy addon enforces governance rules at admission time—think of it as managed Gatekeeper with built-in policy definitions for CIS benchmarks and pod security standards. The secrets provider integrates directly with Azure Key Vault, eliminating the need for external operators and providing automatic secret rotation capabilities.
The --enable-azure-rbac flag enables Kubernetes RBAC authorization through Azure Active Directory, allowing you to manage cluster access using familiar Azure role assignments rather than maintaining separate Kubernetes RoleBindings.
💡 Pro Tip: The
--tier standardflag is easy to overlook but critical for production. It provides a financially-backed SLA (99.95% for zone-redundant deployments) and unlocks features like longer cluster support windows. The free tier offers no SLA and limited support—acceptable for development but inadequate for production workloads.
Configuring Node Pools
AKS distinguishes between system and user node pools—a concept that maps loosely to EKS managed node groups but with clearer separation of concerns. System pools run critical components (CoreDNS, metrics-server), while user pools handle your workloads. This separation ensures that resource-hungry applications cannot starve cluster-critical services.
## Add a dedicated workload node poolaz aks nodepool add \  --resource-group rg-kubernetes-prod \  --cluster-name aks-prod-cluster \  --name workloads \  --node-count 5 \  --node-vm-size Standard_D8s_v5 \  --zones 1 2 3 \  --mode User \  --labels workload-type=general \  --max-pods 50
## Add a spot instance pool for batch workloadsaz aks nodepool add \  --resource-group rg-kubernetes-prod \  --cluster-name aks-prod-cluster \  --name batchspot \  --node-count 0 \  --node-vm-size Standard_D16s_v5 \  --priority Spot \  --eviction-policy Delete \  --spot-max-price -1 \  --enable-cluster-autoscaler \  --min-count 0 \  --max-count 20 \  --mode User
The spot instance pool configuration mirrors EKS Spot node groups. Setting --spot-max-price -1 uses the on-demand price as the ceiling, maximizing availability while still capturing savings. The --eviction-policy Delete ensures terminated spot nodes are removed cleanly rather than deallocated, preventing orphaned resources from accumulating.
The --max-pods 50 setting on the workload pool reflects Azure CNI’s pod density limits. Unlike the kubenet plugin which supports 110 pods per node by default, Azure CNI allocates real VNet IPs to each pod, making subnet planning essential. Calculate your subnet size based on: (max nodes × max pods per node) + reserved addresses.
With your cluster running and node pools configured, you have the foundation for production workloads. The next step involves making a critical architectural decision that impacts everything from pod networking to service mesh compatibility: choosing your CNI plugin and ingress strategy.
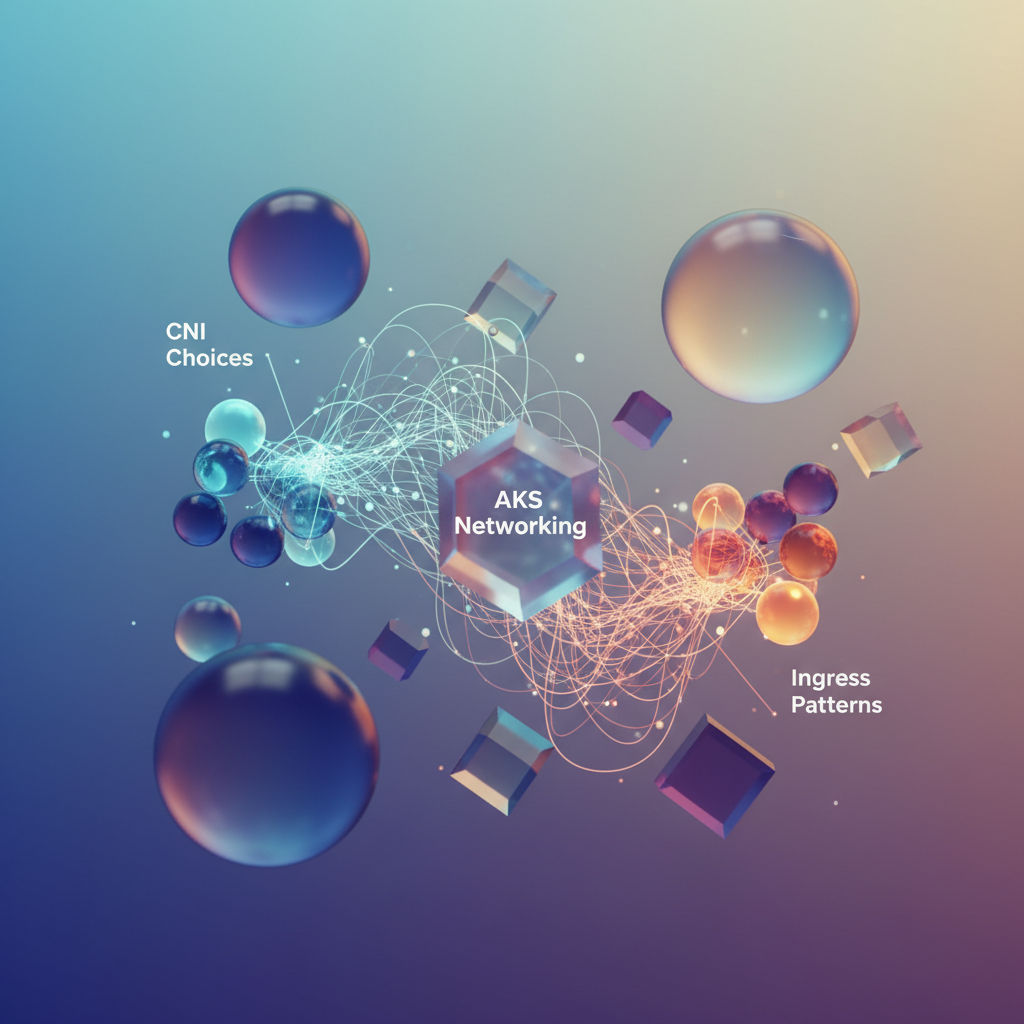
Networking Deep Dive: CNI Choices and Ingress Patterns
Networking is where EKS-to-AKS migrations get interesting. AWS and Azure made fundamentally different decisions about how pods connect to the world, and understanding these differences early prevents production headaches later.
Azure CNI vs Kubenet: The IP Address Trade-off
EKS uses the AWS VPC CNI by default, assigning each pod a real VPC IP address. Azure offers two approaches: Azure CNI (similar to the AWS model) and kubenet (a more traditional overlay network).
Azure CNI assigns pods IP addresses directly from your subnet. Pods become first-class VNET citizens, reachable from on-premises networks and other Azure services without NAT. The trade-off is IP address consumption—a 100-node cluster running 30 pods per node needs 3,000+ addresses before accounting for system pods.
Kubenet uses a CIDR block separate from your VNET, with nodes performing NAT for pod traffic. You conserve VNET IP space but lose direct pod addressability.
For teams migrating from EKS, Azure CNI feels more familiar. Choose kubenet only when VNET IP exhaustion is a real constraint.
apiVersion: containerservice.azure.com/v1kind: AKSClustermetadata: name: production-clusterspec: networkProfile: networkPlugin: azure networkPolicy: calico serviceCidr: 10.0.0.0/16 dnsServiceIP: 10.0.0.10 podCidr: "" # Not needed with Azure CNI - pods use subnet IPs agentPoolProfiles: - name: system vnetSubnetID: /subscriptions/a1b2c3d4-5678-90ab-cdef-1234567890ab/resourceGroups/my-rg/providers/Microsoft.Network/virtualNetworks/my-vnet/subnets/aks-subnet maxPods: 30💡 Pro Tip: The
maxPodssetting directly impacts IP consumption. Plan your subnet size around(node count × maxPods) + nodes + reserved addresses. A /22 subnet gives you roughly 1,000 usable IPs.
Private Clusters and VNET Integration
EKS private clusters disable the public API endpoint. AKS takes a similar approach but integrates more tightly with Azure Private Link.
Enabling private cluster mode moves the Kubernetes API server behind a private endpoint in your VNET. External access requires a VPN, ExpressRoute, or a jump box—no different from private EKS clusters, just with Azure networking primitives.
az aks create \ --name production-cluster \ --resource-group my-rg \ --enable-private-cluster \ --private-dns-zone system \ --vnet-subnet-id /subscriptions/a1b2c3d4-5678-90ab-cdef-1234567890ab/resourceGroups/my-rg/providers/Microsoft.Network/virtualNetworks/my-vnet/subnets/aks-subnetReplacing ALB Ingress Controller with AGIC
AWS teams typically use the ALB Ingress Controller to provision Application Load Balancers from Ingress resources. Azure’s equivalent is the Application Gateway Ingress Controller (AGIC).
AGIC watches Ingress resources and configures Azure Application Gateway accordingly. The conceptual model is identical—annotate your Ingress, get a load balancer—but the annotations differ.
apiVersion: networking.k8s.io/v1kind: Ingressmetadata: name: api-ingress annotations: kubernetes.io/ingress.class: azure/application-gateway appgw.ingress.kubernetes.io/ssl-redirect: "true" appgw.ingress.kubernetes.io/backend-protocol: "http" appgw.ingress.kubernetes.io/health-probe-path: "/health"spec: tls: - hosts: - api.mycompany.com secretName: api-tls-secret rules: - host: api.mycompany.com http: paths: - path: / pathType: Prefix backend: service: name: api-service port: number: 80💡 Pro Tip: AGIC can operate in shared mode (multiple clusters use one Application Gateway) or dedicated mode. Start with dedicated mode for production workloads to avoid configuration conflicts.
Network Policies: Calico Across Clouds
Good news for teams already using Calico on EKS: your NetworkPolicy manifests work on AKS without modification. Azure supports both Azure-native network policies and Calico, but Calico provides the same policy semantics you’re already using.
Enable Calico during cluster creation by setting networkPolicy: calico in your network profile. Your existing policies—denying cross-namespace traffic, restricting egress, isolating sensitive workloads—apply directly.
The one behavioral difference: Azure CNI with Calico evaluates policies at the pod level, while kubenet evaluates at the node level. For consistent behavior matching your EKS setup, stick with Azure CNI.
With networking foundations in place, the next critical migration concern is identity. Azure AD Workload Identity replaces IAM Roles for Service Accounts, and the mapping between the two systems is more nuanced than it first appears.
Identity and Secrets: Azure AD Workload Identity in Practice
If you’ve spent time configuring IAM Roles for Service Accounts (IRSA) in EKS, you’ll find Azure AD Workload Identity conceptually familiar—but the implementation details differ significantly. Both systems eliminate the need for long-lived credentials by federating Kubernetes service accounts with cloud IAM, yet Azure’s approach integrates more tightly with Azure Active Directory’s identity platform. Understanding these differences is essential for a smooth migration that maintains the security posture you’ve established in AWS.
From IRSA to Workload Identity
In EKS, IRSA works by annotating service accounts with IAM role ARNs and configuring an OIDC identity provider. Azure Workload Identity follows a similar pattern but introduces managed identities as the bridge between your pods and Azure resources. This architectural difference means you’ll work with Azure AD constructs rather than IAM policies, though the end result—credential-free access to cloud resources—remains the same.
The core mapping looks like this:
| EKS Concept | AKS Equivalent |
|---|---|
| IAM Role | User-Assigned Managed Identity |
| OIDC Provider | Federated Identity Credential |
eks.amazonaws.com/role-arn annotation | azure.workload.identity/client-id annotation |
| IAM Policy | Azure RBAC Role Assignment |
First, enable workload identity on your cluster and create the managed identity:
az aks update \  --resource-group rg-production \  --name aks-prod-eastus \  --enable-oidc-issuer \  --enable-workload-identity
az identity create \  --name id-app-storage-access \  --resource-group rg-production \  --location eastus
Next, establish the federation trust between your Kubernetes service account and the managed identity:
AKS_OIDC_ISSUER=$(az aks show \  --resource-group rg-production \  --name aks-prod-eastus \  --query "oidcIssuerProfile.issuerUrl" -o tsv)
az identity federated-credential create \  --name fc-app-storage \  --identity-name id-app-storage-access \  --resource-group rg-production \  --issuer "${AKS_OIDC_ISSUER}" \  --subject system:serviceaccount:app-namespace:sa-storage-reader \  --audience api://AzureADTokenExchange
💡 Pro Tip: The
--subjectmust exactly match your namespace and service account name. A mismatch here is the most common cause of authentication failures—triple-check the formatsystem:serviceaccount:<namespace>:<service-account-name>.
Configuring Pods for Identity Federation
With the federation established, annotate your service account and pods:
apiVersion: v1kind: ServiceAccountmetadata: name: sa-storage-reader namespace: app-namespace annotations: azure.workload.identity/client-id: "a1b2c3d4-5678-90ab-cdef-1234567890ab"---apiVersion: apps/v1kind: Deploymentmetadata: name: storage-processor namespace: app-namespacespec: template: metadata: labels: azure.workload.identity/use: "true" spec: serviceAccountName: sa-storage-reader containers: - name: processor image: myregistry.azurecr.io/storage-processor:v2.1.0The azure.workload.identity/use: "true" label triggers the mutating webhook to inject the necessary environment variables and projected token volume. This webhook automatically configures AZURE_CLIENT_ID, AZURE_TENANT_ID, and AZURE_FEDERATED_TOKEN_FILE environment variables, which Azure SDK clients detect and use for authentication without any code changes required in your applications.
Integrating Azure Key Vault with Secrets Store CSI Driver
For secrets management, the Secrets Store CSI Driver replaces the pattern of syncing AWS Secrets Manager to Kubernetes secrets. This approach offers a significant advantage: secrets remain in Key Vault as the source of truth, and your pods access them directly rather than through copied Kubernetes Secret objects. Install the driver with Azure Key Vault provider:
apiVersion: secrets-store.csi.x-k8s.io/v1kind: SecretProviderClassmetadata: name: kv-app-secrets namespace: app-namespacespec: provider: azure parameters: usePodIdentity: "false" useVMManagedIdentity: "false" clientID: "a1b2c3d4-5678-90ab-cdef-1234567890ab" keyvaultName: "kv-prod-secrets" tenantId: "98765432-10fe-dcba-0987-654321fedcba" objects: | array: - | objectName: database-connection-string objectType: secret - | objectName: api-signing-key objectType: secretMount these secrets as files in your pod specification, and they’ll automatically refresh when rotated in Key Vault. Remember to grant your managed identity the “Key Vault Secrets User” role on the Key Vault resource—without this RBAC assignment, pods will authenticate successfully but fail authorization when attempting to read secrets.
Common Federation Pitfalls
Three issues consistently trip up teams migrating from IRSA. First, the token audience must be api://AzureADTokenExchange—using the default Kubernetes audience causes silent authentication failures. Second, federation credentials take 30-60 seconds to propagate; pods created immediately after federation setup will fail to authenticate until propagation completes. Consider adding a brief delay in your CI/CD pipelines between creating federation credentials and deploying workloads.
Third, unlike IRSA where the trust relationship is bidirectional through the OIDC provider configuration, Azure requires explicit federated credential creation for each service account. This means scaling to many service accounts requires automation—consider using Terraform or a Kubernetes operator to manage federated credentials declaratively.
With identity federation properly configured, your workloads can access Azure resources without a single secret stored in your cluster. This foundation becomes essential when we examine persistent storage options, where managed identities govern access to Azure Disks and Azure Files.
Storage Classes and Persistent Volumes
Storage migration from EKS to AKS follows familiar Kubernetes patterns, but the underlying CSI drivers and performance characteristics differ significantly. Understanding these differences prevents production surprises when your stateful workloads go live.
Mapping AWS Storage to Azure Equivalents
The EBS CSI Driver maps directly to Azure Disk CSI Driver for block storage, while EFS translates to Azure Files for shared file systems. Azure adds a third option—Azure NetApp Files—for enterprise workloads requiring sub-millisecond latency.
| AWS Storage | Azure Equivalent | Use Case |
|---|---|---|
| gp3 EBS | Premium SSD v2 | General-purpose databases |
| io2 EBS | Ultra Disk | High-IOPS workloads |
| EFS | Azure Files Premium | Shared storage, CMS |
| FSx for NetApp | Azure NetApp Files | SAP, HPC, analytics |
One critical difference: Azure Disk uses Locally Redundant Storage (LRS) by default, replicating within a single datacenter. For production workloads requiring zone redundancy, explicitly specify Zone Redundant Storage (ZRS) in your storage class parameters.
Storage Class Configuration
AKS provisions default storage classes, but production workloads require explicit configuration. Here’s a storage class matching gp3 performance characteristics:
apiVersion: storage.k8s.io/v1kind: StorageClassmetadata: name: premium-diskprovisioner: disk.csi.azure.comparameters: skuName: Premium_LRS cachingMode: ReadOnly diskEncryptionType: EncryptionAtRestWithPlatformKeyreclaimPolicy: RetainvolumeBindingMode: WaitForFirstConsumerallowVolumeExpansion: trueFor workloads requiring shared access across pods—previously served by EFS—configure Azure Files:
apiVersion: storage.k8s.io/v1kind: StorageClassmetadata: name: azure-files-premiumprovisioner: file.csi.azure.comparameters: skuName: Premium_LRS protocol: nfsmountOptions: - nconnect=4 - actimeo=30reclaimPolicy: RetainvolumeBindingMode: Immediate💡 Pro Tip: Set
volumeBindingMode: WaitForFirstConsumerfor zonal disk storage. This delays provisioning until pod scheduling, ensuring the disk and pod land in the same availability zone.
Migrating Stateful Workloads
PVC definitions remain unchanged during migration—your existing manifests work with updated storage class references. The critical step is data migration itself. For databases, use application-level replication when possible, as it minimizes downtime and validates data integrity during transfer. For file-based workloads, Azure Data Box handles bulk offline transfers efficiently, while AzCopy excels at incremental synchronization over the network.
When your EKS workloads use dynamic provisioning with annotations, verify the AKS storage classes support identical capabilities. Pay particular attention to access modes: Azure Disk supports only ReadWriteOnce, while Azure Files enables ReadWriteMany for multi-pod access.
apiVersion: v1kind: PersistentVolumeClaimmetadata: name: postgres-dataspec: accessModes: - ReadWriteOnce storageClassName: premium-disk resources: requests: storage: 100GiHigh-Performance Shared Storage
Azure NetApp Files warrants consideration for workloads where EFS performance fell short. The service delivers consistent sub-millisecond latency with throughput scaling independent of capacity—ideal for analytics platforms and machine learning pipelines. Unlike Azure Files, NetApp Files provides dedicated capacity pools with predictable performance tiers (Standard, Premium, Ultra), making it suitable for latency-sensitive applications like real-time data processing and high-frequency trading systems.
With storage foundations established, the next challenge is scaling. Karpenter revolutionized node provisioning on EKS, and AKS offers its own approach through KEDA and Cluster Autoscaler integration.
Scaling and Node Management: Karpenter vs KEDA and Cluster Autoscaler
EKS teams running Karpenter have grown accustomed to its declarative provisioning model and rapid scale-up times. AKS takes a different approach, combining the traditional Cluster Autoscaler with KEDA for event-driven scaling—a pairing that delivers comparable flexibility once you understand the configuration patterns.
Cluster Autoscaler Configuration
AKS integrates Cluster Autoscaler directly into managed node pools, eliminating the need for separate controller deployments. Enable and tune it during pool creation:
apiVersion: 2024-01-01kind: AgentPoolmetadata: name: workload-poolspec: enableAutoScaling: true minCount: 2 maxCount: 50 count: 3 vmSize: Standard_D4s_v3 scaleDownMode: Delete scaleSetPriority: RegularFor production workloads, adjust the autoscaler profile at the cluster level to match your scaling patterns:
az aks update \ --resource-group rg-production \ --name aks-prod-eastus \ --cluster-autoscaler-profile \ scale-down-delay-after-add=10m \ scale-down-unneeded-time=10m \ max-graceful-termination-sec=600 \ balance-similar-node-groups=trueUnlike Karpenter’s consolidation behavior, AKS Cluster Autoscaler requires explicit tuning of scale-down-unneeded-time to achieve similar bin-packing efficiency. Karpenter proactively consolidates workloads onto fewer nodes when utilization drops, while Cluster Autoscaler waits for nodes to become completely unneeded before removing them. Teams migrating from Karpenter should also note that AKS lacks Karpenter’s weighted provisioner concept—instead, you define multiple node pools with different VM sizes and use node selectors or affinities to direct workloads appropriately.
Event-Driven Scaling with KEDA
KEDA fills the gap for workloads that need to scale on external metrics—queue depth, HTTP requests, or custom Prometheus queries. While Karpenter handles infrastructure-level scaling based on pending pods, KEDA operates at the application layer, scaling deployments before resource pressure triggers node provisioning. Deploy a ScaledObject to connect your deployments to Azure-native triggers:
apiVersion: keda.sh/v1alpha1kind: ScaledObjectmetadata: name: order-processor-scaler namespace: processingspec: scaleTargetRef: name: order-processor minReplicaCount: 1 maxReplicaCount: 100 triggers: - type: azure-servicebus metadata: queueName: orders-queue namespace: sb-prod-eastus messageCount: "5" authenticationRef: name: servicebus-trigger-auth💡 Pro Tip: KEDA’s
azure-servicebustrigger scales to zero by default. SetminReplicaCount: 1for latency-sensitive workloads that can’t tolerate cold-start delays.
The combination of KEDA and Cluster Autoscaler creates a two-tier scaling system: KEDA scales pods based on business metrics, and Cluster Autoscaler provisions nodes to accommodate those pods. This separation of concerns mirrors what many teams achieve with Karpenter plus HPA, but with clearer boundaries between application and infrastructure scaling decisions.
Azure Spot VMs: Pricing and Interruption Handling
Azure Spot VMs offer up to 90% cost savings, with eviction behavior differing from AWS Spot. Azure provides a 30-second termination notice (versus AWS’s 2-minute warning), requiring tighter pod disruption budgets and faster graceful shutdown handling in your applications:
apiVersion: 2024-01-01kind: AgentPoolmetadata: name: spot-workloadsspec: scaleSetPriority: Spot spotMaxPrice: -1 # Pay up to on-demand price scaleSetEvictionPolicy: Delete nodeLabels: kubernetes.azure.com/scalesetpriority: spot nodeTaints: - kubernetes.azure.com/scalesetpriority=spot:NoScheduleAzure’s pricing model also differs: Spot prices are determined by capacity and demand within each region and VM size combination, with historical pricing available through the Azure portal. Unlike AWS Spot’s interruption frequency metrics, Azure provides eviction rate data that helps you select VM sizes with lower interruption risk for longer-running batch workloads.
Node Image Upgrades and Maintenance Windows
AKS decouples node image updates from Kubernetes version upgrades, providing granular control that EKS teams often implement through custom automation. Configure planned maintenance windows to control when automatic updates occur:
az aks maintenanceconfiguration add \ --resource-group rg-production \ --cluster-name aks-prod-eastus \ --name default \ --weekday Saturday \ --start-hour 2For node image upgrades specifically, enable the auto-upgrade channel:
az aks update \ --resource-group rg-production \ --name aks-prod-eastus \ --node-os-upgrade-channel NodeImageThis combination of Cluster Autoscaler for capacity, KEDA for workload scaling, and structured maintenance windows provides the operational control that production clusters demand. With scaling strategies in place, the final piece is wiring these clusters into your deployment pipelines—where GitOps patterns translate cleanly between cloud providers.
GitOps and Deployment Pipelines: What Transfers, What Changes
The good news for teams with established GitOps workflows: your investment in declarative, Git-driven deployments pays dividends during migration. Kubernetes manifests are inherently portable, and the GitOps tools you’ve built expertise around work identically on AKS.
ArgoCD and Flux: Zero Retraining Required
Both ArgoCD and Flux treat Kubernetes clusters as deployment targets, not platform-specific integrations. Your Application CRDs, Kustomize overlays, and sync configurations transfer directly. Point your existing ArgoCD instance at your new AKS cluster credentials, and deployments flow unchanged.
The same applies to Flux. Your GitRepository sources, Kustomization resources, and HelmRelease definitions remain valid. The reconciliation loop operates identically—Flux polls your Git repository, detects drift, and applies changes regardless of whether the underlying cluster runs on EKS or AKS.
💡 Pro Tip: Run ArgoCD or Flux as a multi-cluster control plane during migration. Deploy to both EKS and AKS simultaneously, validating manifest compatibility before cutting over traffic.
Pipeline Tooling: Choose Your Path
Azure DevOps Pipelines offers native AKS integration with service connections that leverage Azure AD authentication directly. If your organization already uses Azure DevOps for other workloads, this consolidation reduces credential sprawl.
GitHub Actions remains fully viable for AKS deployments. The azure/aks-set-context action handles authentication, and your existing workflow structure stays intact. Teams already invested in GitHub Actions typically find this path requires fewer changes.
Helm Charts: Surgical Updates
Your Helm charts require targeted value file changes rather than structural rewrites. Update storage class references from gp3 to managed-csi, swap ingress annotations for Azure Application Gateway if applicable, and adjust resource identifiers for Azure Key Vault or managed databases.
Create environment-specific value files (values-aks.yaml) that override cloud-specific defaults while preserving the chart’s core logic.
Progressive Delivery Continues
Flagger operates on AKS without modification. Configure it against your preferred ingress controller—whether NGINX, Contour, or Azure Application Gateway Ingress Controller—and canary analysis proceeds as expected. Your rollout strategies, metrics queries, and promotion gates transfer directly.
With deployment pipelines validated, the migration’s application layer is complete. Production readiness now depends on observability—ensuring your monitoring stack captures AKS-specific metrics alongside application telemetry.
Key Takeaways
- Start with Azure CNI and private cluster mode for production workloads—retrofitting network isolation is painful
- Implement Azure AD workload identity from day one instead of storing credentials in secrets
- Use system node pools for critical add-ons and separate user node pools for application workloads to simplify upgrades
- Keep your Helm charts cloud-agnostic by externalizing cloud-specific configuration into environment-specific values files
- Enable Azure Policy for Kubernetes immediately to catch misconfigurations before they reach production