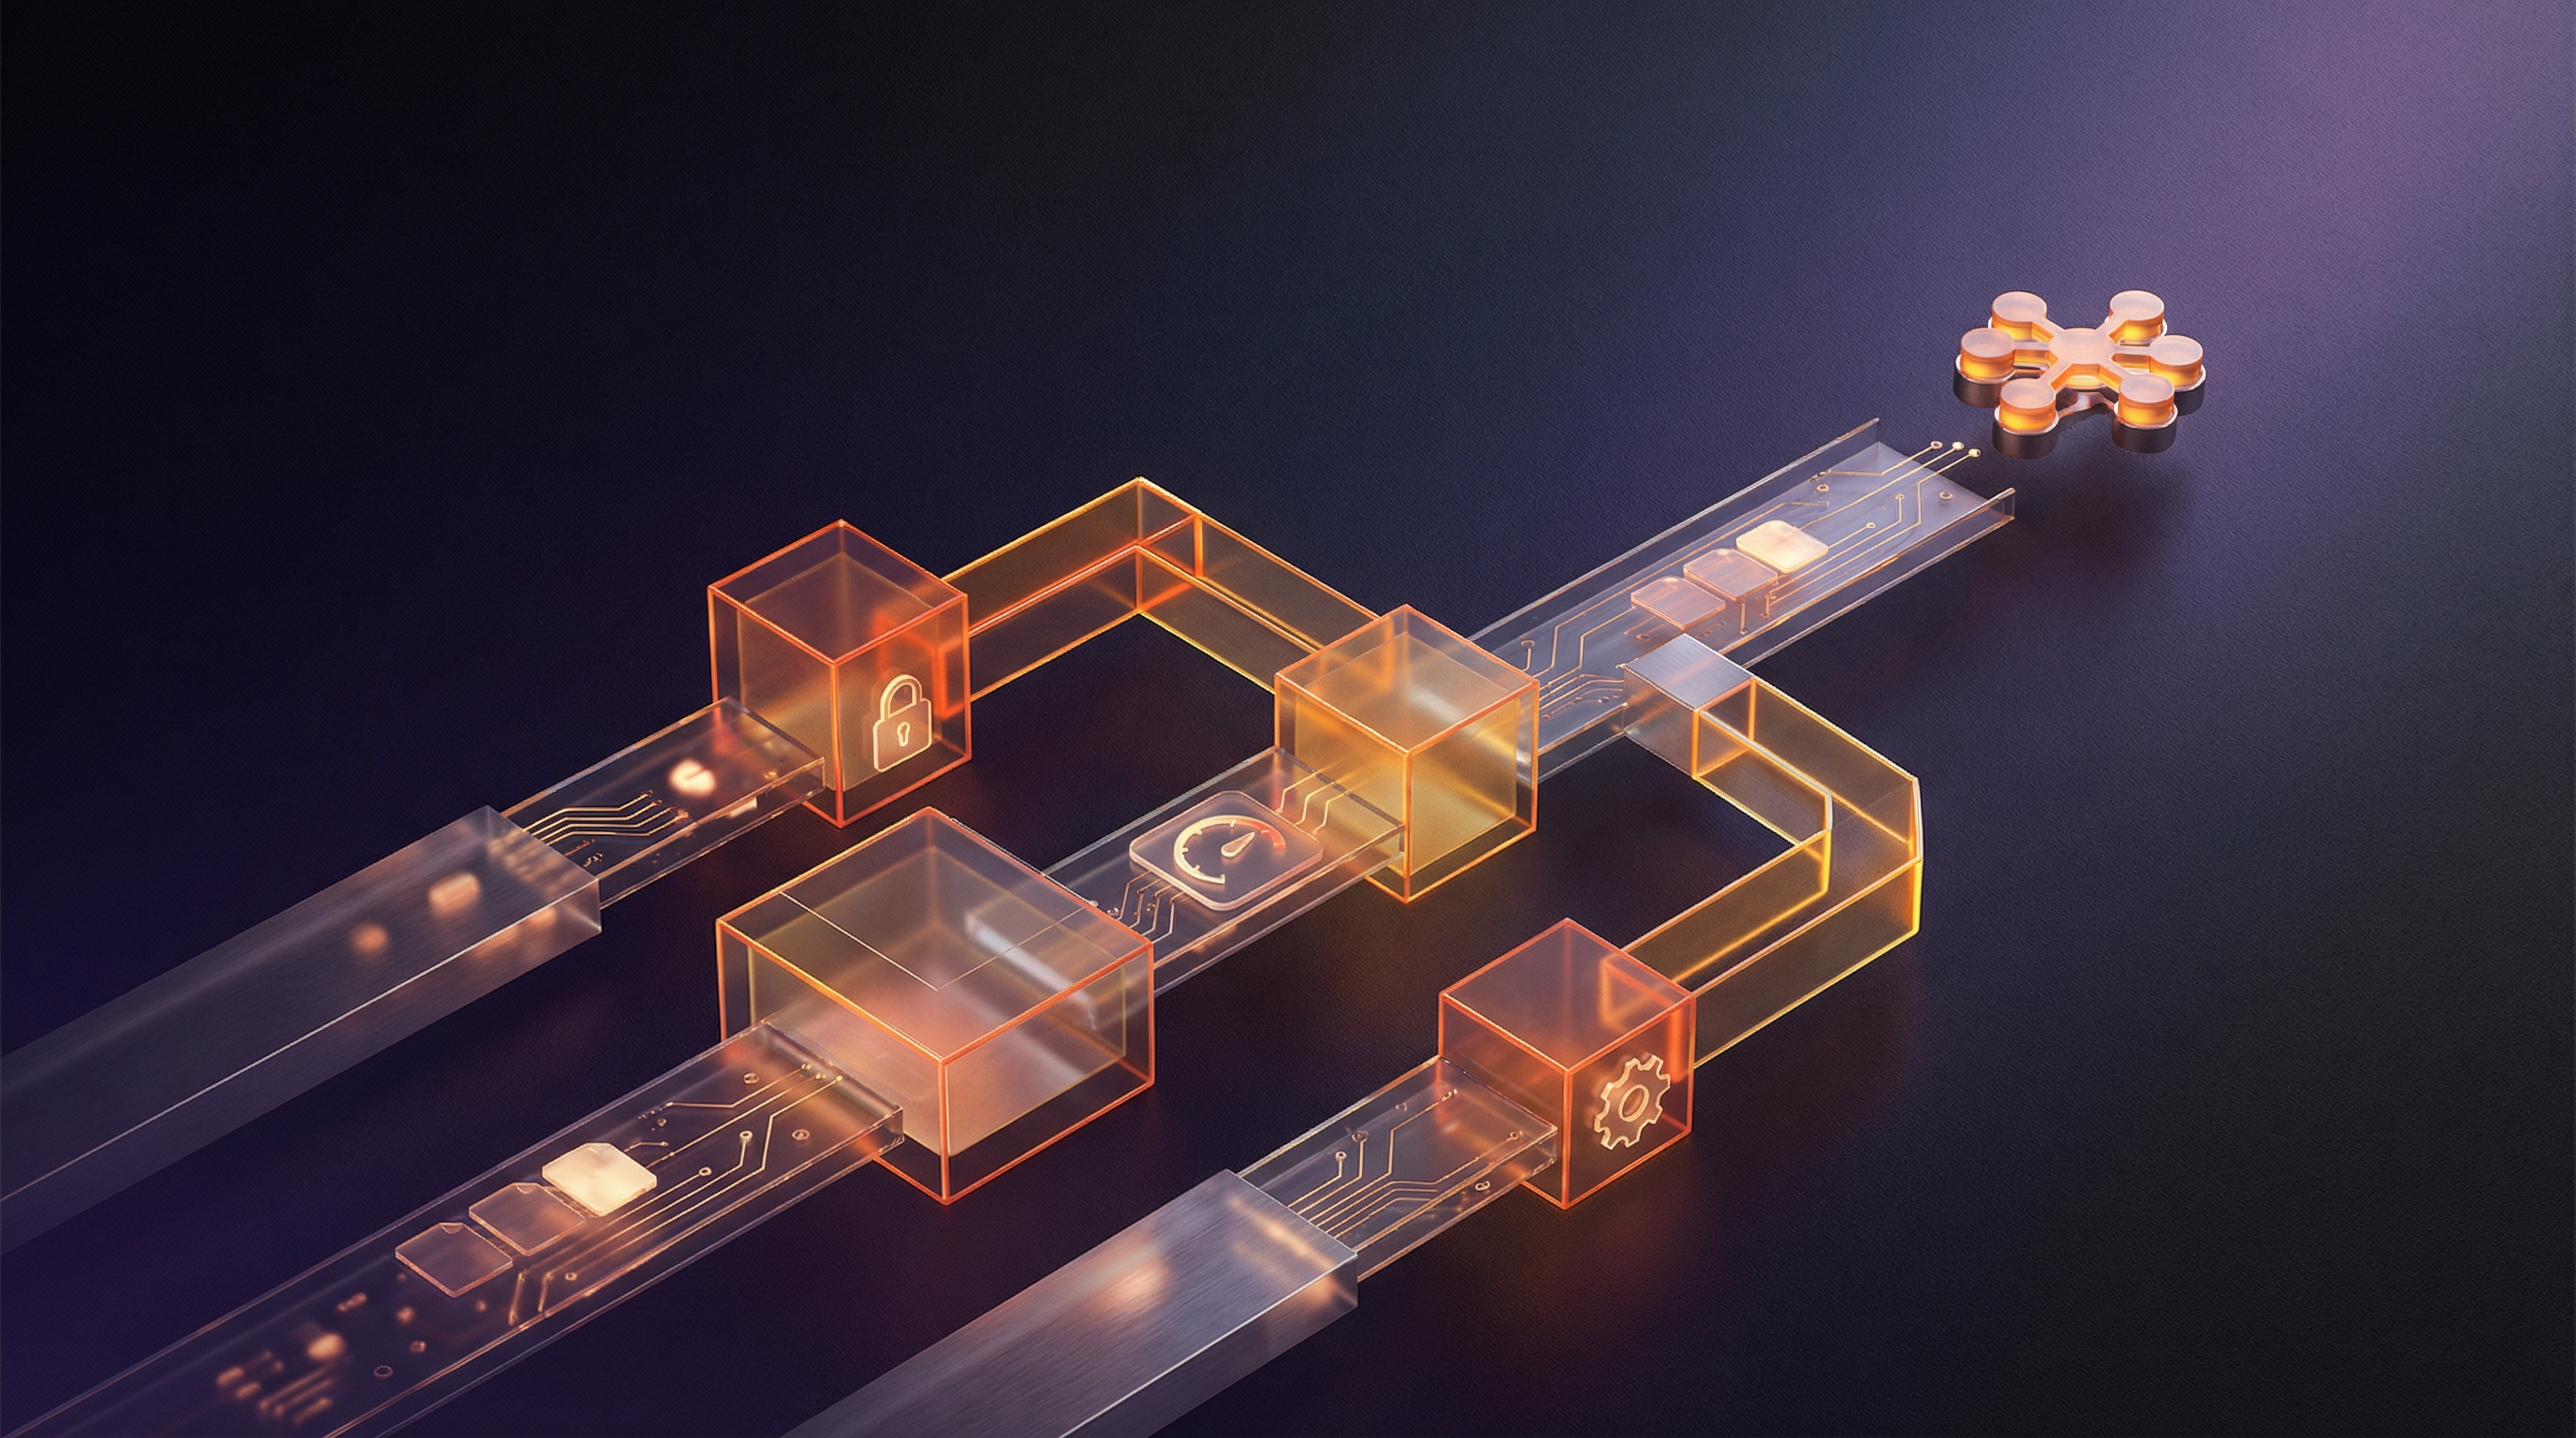
Building a Production-Grade ECR Pipeline for EKS: Security, Performance, and Cost Optimization
Your EKS cluster is pulling a 2GB image on every deployment, your ECR storage costs are climbing 40% month-over-month, and your security team just flagged 47 critical vulnerabilities in production images. Sound familiar?
Most teams treat Amazon ECR as just another Docker registry—push an image, pull it from EKS, call it done. But this oversimplified approach leads to cascading problems: pods stuck in ImagePullBackOff because authentication tokens expired mid-deployment, storage costs spiraling as old images accumulate without lifecycle policies, and security scanners discovering that your “production-ready” images are running packages with known CVEs from six months ago.
The core issue isn’t ECR itself—it’s the gap between how Docker registries typically work and how AWS integrates container registries with Kubernetes. ECR authentication tokens expire every 12 hours, requiring a fundamentally different approach than static credentials. Image pulls traverse multiple network boundaries, creating performance bottlenecks that aren’t immediately obvious. And unlike traditional registries where you might manually curate images, ECR’s tight integration with AWS services means you need automated lifecycle management from day one, not as an afterthought.
The difference between a functional ECR-EKS setup and a production-grade one comes down to understanding these integration patterns: how authentication actually works across IAM, how to structure repositories for different deployment models, and where AWS-specific features like cross-region replication and vulnerability scanning fit into your workflow. Getting these patterns right eliminates entire categories of deployment failures and security incidents.
Let’s start with the foundation that trips up most teams: authentication between EKS and ECR, and why the obvious approach creates problems at scale.
ECR and EKS Authentication: Beyond the Basic Setup
When you create an EKS cluster and start deploying workloads that pull from ECR, the first authentication challenge surfaces immediately: ECR authorization tokens expire every 12 hours. This limitation fundamentally shapes your deployment architecture and determines whether you’ll face intermittent pull failures in production.
The basic approach—using aws ecr get-login-password to generate credentials—works for local development and CI/CD pipelines where you control the execution context. But for pods running in EKS, this creates a token refresh problem. Kubernetes doesn’t automatically renew expired registry credentials, leading to ImagePullBackOff errors when pods restart or scale after the 12-hour window.
You could build a workaround using CronJobs to refresh Docker registry secrets, but this introduces operational complexity and potential race conditions. The secret update might not propagate to all nodes before the old token expires, and you’re left managing yet another critical component in your cluster. This is precisely the problem IRSA was designed to eliminate.
IRSA: The Production-Grade Solution
IAM Roles for Service Accounts (IRSA) eliminates the token expiration problem entirely by allowing pods to assume IAM roles directly through the EKS OIDC provider. Instead of managing credentials, your service accounts authenticate to ECR using temporary credentials that Kubernetes and AWS manage transparently.
The authentication flow works through a web identity token that the kubelet mounts into each pod at /var/run/secrets/eks.amazonaws.com/serviceaccount/token. When your container runtime needs to pull an image, it uses the AWS SDK to exchange this token for temporary IAM credentials by calling sts:AssumeRoleWithWebIdentity. These credentials are short-lived (typically 15 minutes) but are automatically refreshed, solving the 12-hour expiration problem without any manual intervention.
First, create an IAM role with ECR read permissions and establish the trust relationship with your EKS cluster’s OIDC provider:
{ "Version": "2012-10-17", "Statement": [ { "Effect": "Allow", "Action": [ "ecr:GetDownloadUrlForLayer", "ecr:BatchGetImage", "ecr:BatchCheckLayerAvailability" ], "Resource": "arn:aws:ecr:us-east-1:123456789012:repository/*" }, { "Effect": "Allow", "Action": "ecr:GetAuthorizationToken", "Resource": "*" } ]}Then annotate your Kubernetes service account to bind it to the IAM role:
apiVersion: v1kind: ServiceAccountmetadata: name: app-service-account namespace: production annotations: eks.amazonaws.com/role-arn: arn:aws:iam::123456789012:role/ecr-pull-roleReference this service account in your deployment specifications:
apiVersion: apps/v1kind: Deploymentmetadata: name: web-application namespace: productionspec: template: spec: serviceAccountName: app-service-account containers: - name: app image: 123456789012.dkr.ecr.us-east-1.amazonaws.com/web-app:v1.2.3With IRSA configured, pods authenticate seamlessly without credential management. The kubelet requests tokens from the EKS OIDC provider, which AWS validates against your IAM role’s trust policy. This approach also provides superior security boundaries—each service account can assume a different IAM role with precisely scoped permissions, enabling least-privilege access at the pod level rather than the node level.
Private vs. Public ECR Repositories
ECR offers both private and public repository types, and the distinction matters for authentication patterns. Private repositories require AWS credentials for every pull—IRSA handles this for EKS workloads, but external systems need explicit IAM permissions. Public repositories allow anonymous pulls up to 500GB per month, making them suitable for open-source tooling or public-facing images.
Use private repositories for application code and proprietary dependencies. Reserve public repositories for base images you want to share externally or cache frequently-pulled public images to avoid Docker Hub rate limits. Note that even within the same AWS account, pulling from ECR Public still counts against your anonymous quota unless you authenticate, so configure IRSA even for public repositories if you’re pulling high volumes.
Cross-Account Access Patterns
Multi-account architectures—separating development, staging, and production into distinct AWS accounts—require cross-account ECR access. The cleanest approach uses repository policies that grant specific IAM roles from other accounts permission to pull images.
{ "Version": "2012-10-17", "Statement": [ { "Sid": "AllowCrossAccountPull", "Effect": "Allow", "Principal": { "AWS": "arn:aws:iam::987654321098:role/eks-node-role" }, "Action": [ "ecr:BatchGetImage", "ecr:GetDownloadUrlForLayer" ] } ]}Apply this policy to your shared ECR repository in the central account, then configure IRSA in consuming accounts to use roles authorized by this policy. This approach maintains least-privilege access while enabling centralized image management. For production workloads, consider implementing a promotion pipeline that copies tested images from lower environments into production accounts rather than pulling directly across account boundaries—this provides better isolation and faster pulls since images are local to each account.
💡 Pro Tip: Always scope ECR permissions to specific repository ARNs rather than using wildcards. This prevents lateral movement if a service account is compromised and provides clear audit trails for image access patterns.
With authentication mechanisms established, the next critical concern is ensuring the images you’re pulling into production don’t contain exploitable vulnerabilities.
Image Scanning and Vulnerability Management in Production
ECR’s integrated vulnerability scanning capabilities provide two scanning modes: scan-on-push and continuous scanning. Scan-on-push triggers an immediate scan when images are pushed to the repository, while continuous scanning (using Amazon Inspector) monitors images daily for newly disclosed vulnerabilities. For production workloads, enable both modes—scan-on-push provides immediate feedback in CI/CD pipelines, while continuous scanning catches vulnerabilities discovered after deployment.
Configure scan-on-push at the repository level using the AWS CLI:
aws ecr put-image-scanning-configuration \    --repository-name my-app \    --image-scanning-configuration scanOnPush=true \    --region us-east-1
## Enable enhanced scanning (Amazon Inspector) for continuous monitoringaws ecr put-registry-scanning-configuration \    --scan-type ENHANCED \    --rules '[{"repositoryFilters":[{"filter":"*","filterType":"WILDCARD"}],"scanFrequency":"CONTINUOUS_SCAN"}]'
Enhanced scanning provides deeper analysis than basic scanning, detecting vulnerabilities in both operating system packages and programming language dependencies. It uses Amazon Inspector’s continuously updated vulnerability intelligence database, which aggregates data from multiple sources including CVE databases, vendor security advisories, and security research. Enhanced scanning also provides more detailed remediation guidance, including specific package version recommendations and exploitability assessments that help prioritize remediation efforts based on actual risk rather than CVSS scores alone.
Interpreting and Acting on Scan Results
ECR categorizes vulnerabilities using the Common Vulnerability Scoring System (CVSS), assigning severity levels from INFORMATIONAL to CRITICAL. Scan results include CVE identifiers, affected packages, and remediation guidance. However, CVSS scores alone don’t reflect real-world exploitability—a CRITICAL vulnerability in an unused dependency poses less risk than a MEDIUM vulnerability in your application’s authentication layer. Amazon Inspector enhances scan results with exploitability data and network reachability analysis to help prioritize vulnerabilities that actually impact your threat model.
Retrieve scan findings programmatically to integrate with your deployment gates:
import boto3import sys
ecr = boto3.client('ecr', region_name='us-east-1')
def get_scan_findings(repository, image_tag):    response = ecr.describe_image_scan_findings(        repositoryName=repository,        imageId={'imageTag': image_tag}    )
    findings = response['imageScanFindings']['findings']    severity_counts = response['imageScanFindings']['findingSeverityCounts']
    return findings, severity_counts
def check_deployment_criteria(severity_counts):    critical = severity_counts.get('CRITICAL', 0)    high = severity_counts.get('HIGH', 0)
    if critical > 0:        print(f"BLOCKED: {critical} CRITICAL vulnerabilities found")        return False
    if high > 5:        print(f"BLOCKED: {high} HIGH vulnerabilities exceed threshold")        return False
    print("PASSED: Image meets security criteria")    return True
if __name__ == '__main__':    repo = sys.argv[1]    tag = sys.argv[2]
    findings, severity_counts = get_scan_findings(repo, tag)
    if not check_deployment_criteria(severity_counts):        sys.exit(1)
This script can be integrated into CI/CD pipelines as a quality gate—Jenkins, GitLab CI, or GitHub Actions can call it after pushing images to ECR and before deploying to production. Tailor the severity thresholds to your organization’s risk tolerance; some teams enforce zero CRITICAL vulnerabilities while allowing a limited number of HIGH severity findings with documented remediation timelines. For regulated environments, implement stricter policies that require all vulnerabilities above a certain severity to be addressed before production deployment.
Admission Control with OPA and Kyverno
Integrate scan results with Kubernetes admission controllers to enforce security policies at deployment time. Open Policy Agent (OPA) and Kyverno both support validating image signatures and vulnerability scan results before allowing pods to run. This creates a defense-in-depth approach where policy enforcement happens at both the CI/CD gate and the cluster admission layer, preventing unauthorized or vulnerable images from running even if they bypass pipeline checks.
With Kyverno, create a policy that queries ECR scan findings and blocks images with critical vulnerabilities:
apiVersion: kyverno.io/v1kind: ClusterPolicymetadata: name: check-ecr-vulnerabilitiesspec: validationFailureAction: Enforce background: false webhookTimeoutSeconds: 30 rules: - name: block-critical-vulns match: any: - resources: kinds: - Pod preconditions: all: - key: "{{ request.operation }}" operator: In value: ["CREATE", "UPDATE"] validate: message: "Image contains CRITICAL vulnerabilities" deny: conditions: all: - key: "{{ images.*.criticalVulns }}" operator: GreaterThan value: 0 context: - name: images apiCall: urlPath: "/scan-results" jmesPath: "findings[?severity=='CRITICAL']"For OPA-based admission control, deploy the OPA Gatekeeper and create a ConstraintTemplate that validates ECR scan compliance before pod admission. OPA policies offer more flexibility for complex scenarios like allowing specific vulnerabilities with documented exceptions, implementing time-based grace periods for newly discovered CVEs, or enforcing different thresholds across namespaces based on application criticality. Both approaches require building a service that exposes ECR scan results via an API that admission controllers can query—this service should cache scan results to avoid rate limiting and implement retry logic for transient failures.
Compliance Reporting and Audit Trails
Maintain scan result history for compliance audits by configuring EventBridge rules that capture scan completion events and store findings in S3:
import boto3import jsonfrom datetime import datetime
s3 = boto3.client('s3')ecr = boto3.client('ecr')
def archive_scan_results(event, context):    repository = event['detail']['repository-name']    image_digest = event['detail']['image-digest']
    findings = ecr.describe_image_scan_findings(        repositoryName=repository,        imageId={'imageDigest': image_digest}    )
    timestamp = datetime.now().isoformat()    key = f"scan-results/{repository}/{timestamp}-{image_digest[:12]}.json"
    s3.put_object(        Bucket='my-compliance-bucket',        Key=key,        Body=json.dumps(findings, default=str),        ContentType='application/json'    )
    return {'statusCode': 200}
This approach creates an immutable audit trail of all scan results, supporting compliance frameworks like SOC 2 and PCI-DSS that require vulnerability management documentation. Query archived results using Amazon Athena to generate compliance reports showing vulnerability remediation timelines and policy enforcement effectiveness. Create Athena tables partitioned by repository and date to enable efficient queries across scan history—this supports demonstrating to auditors that vulnerabilities are being identified, tracked, and remediated within policy-defined SLAs. Consider implementing automated dashboards using QuickSight or Grafana that visualize vulnerability trends, mean time to remediation, and policy violation rates across your image portfolio.
With vulnerability scanning integrated into your deployment pipeline and admission control enforcing security policies, the next critical concern is managing the lifecycle of images in your registry to control storage costs and maintain operational hygiene.
Lifecycle Policies: Automating Image Cleanup and Cost Control
Without lifecycle policies, ECR repositories accumulate images at an alarming rate. A busy CI/CD pipeline pushing 20 builds per day generates 600 images monthly. At $0.10 per GB, a repository with 500GB of redundant images costs $50/month in completely wasted storage. Lifecycle policies eliminate this waste through automated, rule-based image deletion.
Designing Effective Lifecycle Rules
ECR lifecycle policies operate on two primary dimensions: image count and image age. The most effective strategies combine both approaches with tag-based filtering to protect production assets while aggressively cleaning development artifacts.
A production-grade lifecycle policy targets three categories of images:
Untagged images are the primary cost culprit. Every time you retag an image (like updating latest), ECR leaves the previous image manifest untagged but stored. These orphaned images accumulate rapidly and serve no purpose. In high-velocity environments, untagged images can represent 70-80% of total repository storage within weeks of the first deployment.
Development and test images have short-lived value. Once a feature branch merges or a pull request closes, those associated images become obsolete. Keeping dozens of stale dev- or pr- tagged images wastes storage on artifacts that will never be deployed again.
Production images require careful retention. While you want to clean old releases eventually, premature deletion of production images can break rollback capabilities or compliance requirements. Most organizations balance storage costs against operational safety by retaining production images for 30-90 days, with critical releases tagged for indefinite retention.
{ "rules": [ { "rulePriority": 1, "description": "Delete untagged images after 1 day", "selection": { "tagStatus": "untagged", "countType": "sinceImagePushed", "countUnit": "days", "countNumber": 1 }, "action": { "type": "expire" } }, { "rulePriority": 2, "description": "Keep only last 5 dev images", "selection": { "tagStatus": "tagged", "tagPrefixList": ["dev-", "test-", "pr-"], "countType": "imageCountMoreThan", "countNumber": 5 }, "action": { "type": "expire" } }, { "rulePriority": 3, "description": "Keep production images for 90 days", "selection": { "tagStatus": "tagged", "tagPrefixList": ["prod-", "v1.", "v2."], "countType": "sinceImagePushed", "countUnit": "days", "countNumber": 90 }, "action": { "type": "expire" } } ]}Rule priority determines evaluation order—lower numbers execute first. Structure your policies to protect production images with higher-priority rules, then clean aggressively with subsequent rules. ECR evaluates each image against all rules in priority order and stops at the first match, so a production image matching rule 3 will never be evaluated against rule 2’s more aggressive deletion criteria.
Testing with Dry-Run Mode
Never deploy lifecycle policies directly to production. ECR’s preview feature shows exactly which images will be deleted before any action occurs.
aws ecr put-lifecycle-policy \  --repository-name my-app \  --lifecycle-policy-text file://lifecycle-policy.json
aws ecr get-lifecycle-policy-preview \  --repository-name my-app
The preview output lists every image marked for deletion with its tags, push timestamp, and size. Review this output carefully—deleted images cannot be recovered. Common mistakes include overly aggressive imageCountMoreThan values that delete recent production releases or missing tag prefixes that expose critical images to deletion.
Run the preview, export the results to a file, and analyze the impact before enabling the policy. Pay special attention to images tagged for deletion that were pushed recently—if your policy is deleting images from the last 48 hours, your rules are likely too aggressive. Validate that your expected image count aligns with the preview results. If you anticipate keeping 10 production images but the preview shows 3, your tagPrefixList may not match your actual tagging convention.
Tag Strategy Integration
Lifecycle policies are only as good as your tagging discipline. Implement a consistent tagging convention across your CI/CD pipeline:
- Production releases:
prod-{version}or semantic versions likev1.2.3 - Development builds:
dev-{branch}-{commit-sha} - Pull request builds:
pr-{number}-{commit-sha} - Staging deployments:
staging-{timestamp}orstg-{version}
This structure enables precise lifecycle rules that retain production artifacts indefinitely while cleaning development images after days or keeping only the most recent five builds. Without consistent tagging, lifecycle policies become blunt instruments that either delete too aggressively and risk removing needed images, or clean too conservatively and fail to reduce costs.
Document your tagging strategy in your team’s deployment runbook and enforce it through CI/CD pipeline validation. A simple pipeline check that rejects pushes with non-compliant tags prevents lifecycle policy mismatches before they cause problems.
💡 Pro Tip: Set up CloudWatch alarms on the
RepositoryStorageBytesmetric to track the impact of your lifecycle policies. A well-configured policy typically reduces storage by 60-80% within the first week of deployment.
With lifecycle policies managing storage automatically, the next optimization focuses on the build and push process itself—where inefficient layer caching and transfer strategies waste developer time and network bandwidth.
Optimizing Image Build and Push Performance
Image build and push performance directly impacts deployment velocity and developer productivity. A poorly optimized container image can add minutes to every CI/CD run, while an efficient build strategy reduces pipeline time by 40-60% and decreases network transfer costs. Modern containerization workflows require careful attention to layer caching, base image selection, and registry integration to achieve optimal throughput.
Multi-Stage Builds for Minimal Image Size
Multi-stage Docker builds separate build dependencies from runtime requirements, producing smaller images with fewer layers. This architecture reduces both push time to ECR and pull time on EKS nodes by eliminating unnecessary artifacts from the final container.
## Build stage with full toolchainFROM node:20-alpine AS builderWORKDIR /appCOPY package*.json ./RUN npm ci --only=production && \    npm cache clean --forceCOPY . .RUN npm run build
## Production stage with minimal footprintFROM node:20-alpine AS runtimeWORKDIR /app
## Copy only built artifacts and production dependenciesCOPY --from=builder /app/dist ./distCOPY --from=builder /app/node_modules ./node_modulesCOPY package*.json ./
## Create non-root userRUN addgroup -g 1001 -S nodejs && \    adduser -S nodejs -u 1001USER nodejs
EXPOSE 3000CMD ["node", "dist/main.js"]
This pattern eliminates build tools, source files, and development dependencies from the final image. For a typical Node.js application, this reduces image size from 1.2GB to 180MB—an 85% reduction that translates to faster ECR pushes and EKS pod startup times. Each stage runs independently, enabling parallel execution in build systems that support concurrent stage processing.
Beyond size reduction, multi-stage builds improve security by minimizing attack surface. The runtime stage contains only production dependencies and compiled artifacts, reducing vulnerability exposure from unused packages and development tooling.
Leveraging ECR Layer Caching
Docker’s layer caching mechanism works seamlessly with ECR when structured correctly. Order Dockerfile instructions from least to most frequently changed, ensuring that dependency installation layers remain cached across code modifications:
FROM python:3.11-slim
## System dependencies (rarely change)RUN apt-get update && apt-get install -y --no-install-recommends \    libpq-dev gcc && \    rm -rf /var/lib/apt/lists/*
## Application dependencies (change occasionally)COPY requirements.txt .RUN pip install --no-cache-dir -r requirements.txt
## Application code (changes frequently)COPY src/ ./src/
In CI/CD pipelines, configure Docker to use ECR as a cache source. This enables incremental builds that skip unchanged layers, reducing build times from minutes to seconds for code-only changes:
#!/bin/bashAWS_ACCOUNT_ID="123456789012"AWS_REGION="us-east-1"IMAGE_NAME="api-service"IMAGE_TAG="$(git rev-parse --short HEAD)"
ECR_REGISTRY="${AWS_ACCOUNT_ID}.dkr.ecr.${AWS_REGION}.amazonaws.com"ECR_REPO="${ECR_REGISTRY}/${IMAGE_NAME}"
## Pull latest image for cachedocker pull "${ECR_REPO}:latest" || true
## Build with cache from ECRdocker build \  --cache-from "${ECR_REPO}:latest" \  --tag "${ECR_REPO}:${IMAGE_TAG}" \  --tag "${ECR_REPO}:latest" \  .
## Push both tagsdocker push "${ECR_REPO}:${IMAGE_TAG}"docker push "${ECR_REPO}:latest"
For organizations using Docker BuildKit, enable inline cache metadata with --build-arg BUILDKIT_INLINE_CACHE=1 to embed cache information directly in the image manifest. This eliminates the need to pull base images explicitly, as BuildKit automatically fetches only the layers it needs.
Parallel Image Push Strategies
Large images benefit from parallel layer uploads to ECR. Docker automatically pushes independent layers concurrently, but you can optimize throughput by configuring the Docker daemon’s max concurrent uploads:
{ "max-concurrent-uploads": 10}For multi-architecture builds, use Docker Buildx to push AMD64 and ARM64 variants simultaneously:
docker buildx build \ --platform linux/amd64,linux/arm64 \ --tag "${ECR_REPO}:${IMAGE_TAG}" \ --push \ .This approach enables graviton-based EKS nodes to pull native ARM images while maintaining x86 compatibility, with a single build command pushing both architectures in parallel.
Base Image Strategy
Base image selection significantly impacts build performance and security posture. Use official minimal variants to reduce layer count and total image size:
- Alpine Linux: 5-7MB base, ideal for Go and Node.js applications
- Distroless: No package manager or shell, maximum security for Java and Python
- Slim variants: Debian-based with minimal tooling, balance between compatibility and size
Maintain organization-wide base images in a dedicated ECR repository. This enables centralized vulnerability patching and consistent dependency versions across services:
FROM node:20-alpineRUN apk add --no-cache dumb-init ca-certificates && \ addgroup -g 1001 -S appuser && \ adduser -S appuser -u 1001USER appuserENTRYPOINT ["dumb-init", "--"]Teams then build application images from this hardened base, inheriting security patches automatically when the base image updates. Schedule automated base image rebuilds weekly to incorporate upstream security fixes without requiring application code changes.
Pull-Through Cache Configuration
For external dependencies, ECR’s pull-through cache feature reduces build times and external bandwidth costs. Configure a caching rule for Docker Hub and other public registries:
aws ecr create-pull-through-cache-rule \ --ecr-repository-prefix docker-hub \ --upstream-registry-url registry-1.docker.io \ --region us-east-1When configured, references to public.ecr.aws/docker/library/node:20-alpine automatically cache layers in your ECR, eliminating repeated external pulls during builds. This proves especially valuable in CI environments running hundreds of builds daily, reducing dependency on external registry availability and improving build consistency.
Performance optimization extends beyond build efficiency. The next section explores cross-region replication strategies that ensure low-latency image pulls regardless of cluster location while maintaining high availability during regional outages.
Cross-Region Replication and High Availability
Regional outages are rare but inevitable. When your production EKS clusters span multiple regions, cross-region ECR replication ensures your container images remain accessible regardless of AWS service disruptions. Unlike ad-hoc replication strategies, ECR’s native replication provides automated, eventual consistency across regions with minimal operational overhead.
Configuring Replication Rules
ECR replication operates at the registry level, not per repository. A single replication configuration can mirror all repositories to one or more destination regions:
aws ecr put-replication-configuration \ --replication-configuration '{ "rules": [ { "destinations": [ { "region": "us-west-2", "registryId": "123456789012" }, { "region": "eu-west-1", "registryId": "123456789012" } ], "repositoryFilters": [ { "filter": "prod-*", "filterType": "PREFIX_MATCH" } ] } ] }' \ --region us-east-1Repository filters prevent unnecessary replication of development or staging images. Only production-tagged images consume cross-region bandwidth and storage. You can define multiple rules with different filter criteria, allowing granular control over which repositories replicate to which regions. For example, customer-facing services might replicate globally while internal tools replicate only to a secondary US region.
Cross-account replication is also supported by specifying a different registryId in the destination configuration. This enables scenarios where a central DevOps account replicates approved images to application-specific AWS accounts in different regions, maintaining both geographic redundancy and organizational boundaries.
Understanding Replication Economics
Cross-region replication incurs three cost components: data transfer out charges from the source region (typically $0.09/GB to other US regions, $0.09-$0.15/GB to international regions), storage costs in destination regions ($0.10/GB-month), and API request costs for the replication process itself. For a team pushing 50GB of production images monthly to two additional regions, expect approximately $15-20 in monthly replication costs.
Storage costs compound over time. An image replicated to three regions consumes 4x the storage of a single-region image (source plus three replicas). This makes lifecycle policies essential for cost control. Without active cleanup, a year of weekly releases can accumulate hundreds of gigabytes per region.
Bandwidth considerations extend beyond cost. Replicating multi-gigabyte images during business hours can saturate network connections or trigger AWS service quotas. Schedule large replication jobs during off-peak hours, or implement rate limiting in your CI/CD pipeline to avoid impacting other workloads sharing the same AWS network capacity.
💡 Pro Tip: Combine lifecycle policies with replication filters to replicate only tagged releases. Replicating every development build multiplies costs unnecessarily.
Regional Endpoint Configuration for EKS
EKS clusters automatically resolve ECR endpoints to their local region. When architecting multi-region deployments, configure your Kubernetes manifests to reference region-agnostic ECR URLs:
## Pull from local region automaticallykubectl set image deployment/api-server \  api=123456789012.dkr.ecr.us-west-2.amazonaws.com/prod-api:v1.2.3
## Verify regional endpoint resolutionkubectl get pods -o jsonpath='{.items[0].spec.containers[0].image}'
The ECR endpoint structure (dkr.ecr.<region>.amazonaws.com) ensures clusters pull from their local replica, reducing latency and eliminating cross-region data transfer costs during normal operations. Image pulls within the same region are free; cross-region pulls incur both egress charges and increased latency (typically 50-150ms additional round-trip time for inter-region calls).
For multi-region Kubernetes deployments using GitOps tools like ArgoCD or Flux, parameterize the region component of image URLs using environment-specific overlays. This allows identical application manifests to deploy across regions while automatically resolving to local ECR endpoints.
Handling Replication Lag
ECR replication is eventually consistent, typically completing within 30-60 seconds for images under 1GB. Larger images (5GB+) may take several minutes depending on cross-region network conditions. In active-active multi-region scenarios, this lag creates a deployment window where a newly pushed image exists in the source region but not yet in replicas. Implement health checks in your CI/CD pipeline:
check_image_replicated() {  local region=$1  local image=$2  aws ecr describe-images \    --repository-name prod-api \    --image-ids imageTag=v1.2.3 \    --region "$region" \    --query 'imageDetails[0].imagePushedAt' \    --output text 2>/dev/null}
## Wait for replication before promoting deploymentfor region in us-west-2 eu-west-1; do  until check_image_replicated "$region" "v1.2.3"; do    echo "Waiting for replication to $region..."    sleep 10  donedone
Replication failures are rare but possible, typically caused by IAM permission issues or service quota limits in destination regions. Monitor CloudWatch metrics like ReplicationLatency and ReplicationErrors to detect and alert on replication problems before they impact deployments. Configure CloudWatch alarms with SNS notifications to your ops team when replication lag exceeds acceptable thresholds for your deployment cadence.
With replication configured and regional pulls optimized, the next critical piece is maintaining visibility into your ECR operations through comprehensive monitoring and metrics.
Monitoring, Metrics, and Operational Visibility
Observability transforms ECR from a black box into a measurable component of your infrastructure. Without proper monitoring, you won’t detect failed pulls during deployments, identify cost spikes from unmanaged storage, or track which teams are pushing vulnerable images. Production ECR operations demand visibility into pull patterns, authentication failures, scan results, storage growth, and cross-account access patterns.
Essential CloudWatch Metrics
ECR publishes key metrics to CloudWatch that reveal registry health and usage patterns. The most critical indicators include RepositoryPullCount and RepositoryPushCount for tracking registry activity, ImageScanFindings for security posture monitoring, and estimated repository size for capacity planning. While AWS doesn’t expose real-time storage metrics through CloudWatch, you can calculate storage using the DescribeImages API and aggregate uncompressed layer sizes.
Monitor pull-to-push ratios to identify caching opportunities—repositories with 50:1 pull-to-push ratios benefit from replication to edge regions or pull-through cache configurations. Track pull latency alongside container startup times to detect network bottlenecks or registry throttling. Sudden drops in pull count during deployment windows signal authentication failures or policy misconfigurations that block legitimate access.
import boto3from datetime import datetime, timedelta
cloudwatch = boto3.client('cloudwatch')ecr = boto3.client('ecr')
def create_ecr_dashboards(repository_name):    """Create CloudWatch dashboard for ECR monitoring"""
    dashboard_body = {        "widgets": [            {                "type": "metric",                "properties": {                    "metrics": [                        ["AWS/ECR", "RepositoryPullCount", {"stat": "Sum"}],                        [".", "RepositoryPushCount", {"stat": "Sum"}]                    ],                    "period": 300,                    "stat": "Average",                    "region": "us-east-1",                    "title": "ECR Pull/Push Activity"                }            },            {                "type": "metric",                "properties": {                    "metrics": [                        ["AWS/ECR", "ImageScanFindings",                         {"dimensions": {"RepositoryName": repository_name, "FindingSeverity": "CRITICAL"}}],                        ["...", "HIGH"],                        ["...", "MEDIUM"]                    ],                    "period": 3600,                    "stat": "Maximum",                    "title": "Security Scan Findings by Severity"                }            }        ]    }
    cloudwatch.put_dashboard(        DashboardName=f'ECR-{repository_name}',        DashboardBody=str(dashboard_body)    )
def create_storage_alert(repository_name, threshold_gb=100):    """Alert when repository storage exceeds threshold"""
    cloudwatch.put_metric_alarm(        AlarmName=f'ecr-storage-{repository_name}',        ComparisonOperator='GreaterThanThreshold',        EvaluationPeriods=1,        MetricName='RepositorySize',        Namespace='AWS/ECR',        Period=86400,        Statistic='Average',        Threshold=threshold_gb * 1024 * 1024 * 1024,  # Convert to bytes        ActionsEnabled=True,        AlarmActions=['arn:aws:sns:us-east-1:123456789012:ecr-alerts'],        Dimensions=[{'Name': 'RepositoryName', 'Value': repository_name}]    )
def create_pull_failure_alert(repository_name):    """Alert on authentication or authorization failures during image pulls"""
    logs = boto3.client('logs')
    logs.put_metric_filter(        logGroupName='/aws/ecr/api-calls',        filterName=f'ecr-pull-failures-{repository_name}',        filterPattern='{ ($.eventName = "BatchGetImage") && ($.errorCode = "*") }',        metricTransformations=[{            'metricName': 'PullFailures',            'metricNamespace': 'ECR/Custom',            'metricValue': '1',            'dimensions': {                'RepositoryName': repository_name,                'ErrorCode': '$.errorCode'            }        }]    )
    cloudwatch.put_metric_alarm(        AlarmName=f'ecr-pull-failures-{repository_name}',        ComparisonOperator='GreaterThanThreshold',        EvaluationPeriods=1,        MetricName='PullFailures',        Namespace='ECR/Custom',        Period=300,        Statistic='Sum',        Threshold=5,        ActionsEnabled=True,        AlarmActions=['arn:aws:sns:us-east-1:123456789012:ecr-alerts']    )
def track_failed_pulls(hours=24):    """Query CloudWatch Logs for authentication failures"""
    logs = boto3.client('logs')
    query = """    fields @timestamp, userIdentity.principalId, errorCode, errorMessage, requestParameters.repositoryName    | filter eventName = "BatchGetImage" and errorCode exists    | stats count() by errorCode, userIdentity.principalId, requestParameters.repositoryName    | sort count() desc    """
    response = logs.start_query(        logGroupName='/aws/ecr/pull-errors',        startTime=int((datetime.now() - timedelta(hours=hours)).timestamp()),        endTime=int(datetime.now().timestamp()),        queryString=query    )
    return response['queryId']
💡 Pro Tip: Enable CloudWatch Container Insights for your EKS cluster to correlate ECR pull metrics with pod startup times. High pull latency often indicates network issues, undersized registry endpoints, or images stored in regions distant from compute resources.
Image Provenance and Deployment Tracking
Understanding which images are deployed where requires tracking the full lineage from build to production. Tag images with build metadata and query CloudWatch Logs Insights to reconstruct deployment history. This visibility proves essential during incident response when you need to identify which services are running vulnerable image versions or trace a bad deployment back to its source commit.
Implement image signing with AWS Signer or Notary v2 to establish cryptographic proof of provenance. Store build metadata in Systems Manager Parameter Store indexed by image digest—tags are mutable and unreliable for audit trails, but digests provide immutable references. During security incidents, this metadata enables rapid identification of affected deployments without manually inspecting running containers.
def tag_image_with_metadata(repository_name, image_tag, build_info):    """Apply provenance tags during CI/CD pipeline"""
    manifest = ecr.batch_get_image(        repositoryName=repository_name,        imageIds=[{'imageTag': image_tag}]    )
    image_digest = manifest['images'][0]['imageId']['imageDigest']
    ecr.put_image_tag_mutability(        repositoryName=repository_name,        imageTagMutability='IMMUTABLE'    )
    # Store metadata in parameter store for queryability    ssm = boto3.client('ssm')    ssm.put_parameter(        Name=f'/ecr/provenance/{repository_name}/{image_digest}',        Value=str({            'git_commit': build_info['commit_sha'],            'build_time': build_info['timestamp'],            'pipeline_id': build_info['pipeline_run'],            'built_by': build_info['actor']        }),        Type='String',        Tier='Intelligent-Tiering'    )
def query_deployment_history(repository_name, days=30):    """Track which images were pulled by which services"""
    logs = boto3.client('logs')
    query = f"""    fields @timestamp, requestParameters.imageIds.0.imageTag, userIdentity.principalId    | filter eventName = "BatchGetImage" and requestParameters.repositoryName = "{repository_name}"    | stats count() by requestParameters.imageIds.0.imageTag, userIdentity.principalId    """
    response = logs.start_query(        logGroupName='/aws/ecr/api-calls',        startTime=int((datetime.now() - timedelta(days=days)).timestamp()),        endTime=int(datetime.now().timestamp()),        queryString=query    )
    return response['queryId']
Cost Allocation and Team Attribution
Tag repositories with team ownership and cost center identifiers to track spending across organizational boundaries. AWS Cost Explorer can then segment ECR costs by team, environment, and application. Storage costs dominate ECR billing—a single repository retaining 500 multi-gigabyte images accumulates hundreds of dollars monthly. Without team-level attribution, you can’t identify which teams are driving costs or enforce accountability for cleanup.
Implement automated cost anomaly detection using Cost Anomaly Detection service configured to alert on ECR spending increases exceeding 20% week-over-week. Combine this with custom CloudWatch metrics tracking storage growth per repository to proactively identify teams that need lifecycle policy adjustments before costs spike.
def apply_cost_tags(repository_name, team, environment, application):    """Apply cost allocation tags for billing reports"""
    ecr.tag_resource(        resourceArn=f'arn:aws:ecr:us-east-1:123456789012:repository/{repository_name}',        tags=[            {'Key': 'Team', 'Value': team},            {'Key': 'Environment', 'Value': environment},            {'Key': 'Application', 'Value': application},            {'Key': 'CostCenter', 'Value': f'{team}-containers'},            {'Key': 'ManagedBy', 'Value': 'terraform'}        ]    )
def generate_cost_report(start_date, end_date):    """Generate ECR cost breakdown by team and environment"""
    ce = boto3.client('ce')
    response = ce.get_cost_and_usage(        TimePeriod={'Start': start_date, 'End': end_date},        Granularity='MONTHLY',        Metrics=['UnblendedCost', 'UsageQuantity'],        GroupBy=[            {'Type': 'TAG', 'Key': 'Team'},            {'Type': 'TAG', 'Key': 'Environment'}        ],        Filter={'Dimensions': {'Key': 'SERVICE', 'Values': ['Amazon EC2 Container Registry']}}    )
    return response['ResultsByTime']
def analyze_storage_trends(repository_name):    """Calculate storage growth rate for capacity planning"""
    paginator = ecr.get_paginator('describe_images')
    total_size = 0    image_count = 0
    for page in paginator.paginate(repositoryName=repository_name):        for image in page['imageDetails']:            total_size += image.get('imageSizeInBytes', 0)            image_count += 1
    # Publish custom metric for trending    cloudwatch.put_metric_data(        Namespace='ECR/Custom',        MetricData=[{            'MetricName': 'RepositoryStorageBytes',            'Value': total_size,            'Unit': 'Bytes',            'Dimensions': [{'Name': 'RepositoryName', 'Value': repository_name}]        }]    )
    return {'total_gb': total_size / (1024**3), 'image_count': image_count}
These monitoring foundations enable proactive issue detection and informed capacity planning. The next section synthesizes these components into production-ready architecture patterns that demonstrate how authentication, scanning, lifecycle management, and monitoring integrate into a cohesive registry platform.
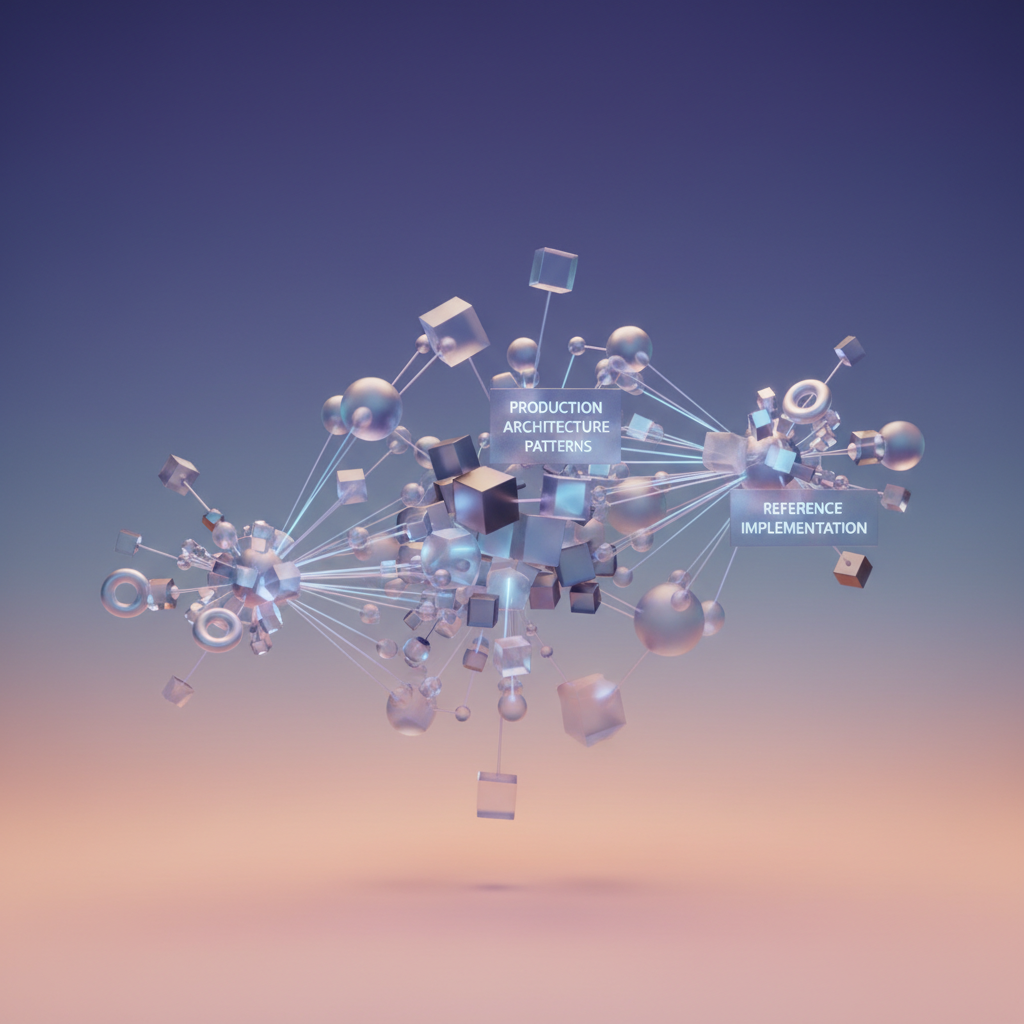
Production Architecture Patterns and Reference Implementation
With individual components configured, the complete ECR-to-EKS workflow requires careful orchestration across your CI/CD pipeline, environment promotion, and deployment automation. Here’s how production-grade architectures typically structure these integrations.
End-to-End Workflow Architecture
A robust production pipeline follows this pattern: CI builds create tagged images pushed to ECR, where automated scanning blocks deployment of vulnerable images. Approved images get promoted through environments using immutable tags, while GitOps controllers watch for image updates and reconcile deployments.
The critical decision point is image promotion strategy. Some teams use ECR repository per environment (app-dev, app-prod), enabling strict IAM boundaries and independent lifecycle policies. Others use a single repository with tag prefixes (dev-v1.2.3, prod-v1.2.3), simplifying cross-region replication and reducing repository sprawl. The multi-repository approach provides stronger security isolation; single-repository offers operational simplicity.
GitOps Integration with ArgoCD
ArgoCD’s ECR integration requires authentication refresh since ECR tokens expire after 12 hours. Deploy a credential helper that runs aws ecr get-login-password on a cron schedule, updating the argocd-image-updater secret. Configure image updater with semver constraints:
argocd.argoproj.io/image-list: backend=123456789012.dkr.ecr.us-east-1.amazonaws.com/backendargocd.argoproj.io/image-update-strategy: backend=semver:~1.2For multi-environment promotion, leverage ArgoCD’s applicationSet generator with ECR tag queries. When images pass staging validation, your promotion pipeline retags them (prod-v1.2.3) triggering automatic production deployment through ArgoCD’s sync mechanism.
Environment Promotion Patterns
Production teams typically implement one of two promotion models:
Immutable promotion: Each environment pulls from the same image digest, changing only configuration. CI tags images as sha-abc123, staging validates, then production references the identical digest. This guarantees binary equivalence across environments but requires careful configuration management.
Mutable tag promotion: Images flow through environment-specific tags (latest-dev → stable-staging → release-prod). Simpler to implement but risks configuration drift. Combine with digest pinning in production manifests for safety.
Common Production Pitfalls
The most frequent issue is IAM permission gaps during image pulls. EKS node roles need ecr:BatchCheckLayerAvailability and ecr:BatchGetImage on all repositories accessed by the cluster, including base images. Forgetting to grant access to upstream dependencies causes cryptic ImagePullBackOff errors.
Another trap is scanning policy violations blocking legitimate deployments. Configure scan exemptions for known acceptable CVEs and implement automatic bypass for severity levels below your risk threshold. Document all exemptions with business justification.
With your complete architecture established, maintaining visibility into this pipeline’s health becomes essential for operational success.
Key Takeaways
- Implement IRSA-based authentication to eliminate ECR token expiration issues and reduce security surface area
- Configure lifecycle policies early—even small clusters can accumulate hundreds of unused images costing thousands annually
- Enable scan-on-push and integrate findings with Kubernetes admission controllers to prevent vulnerable images from reaching production
- Optimize your Dockerfile with multi-stage builds and layer caching to reduce build times by 40-60% and deployment times significantly
- Set up CloudWatch alerts for storage growth and failed image pulls before they become production incidents